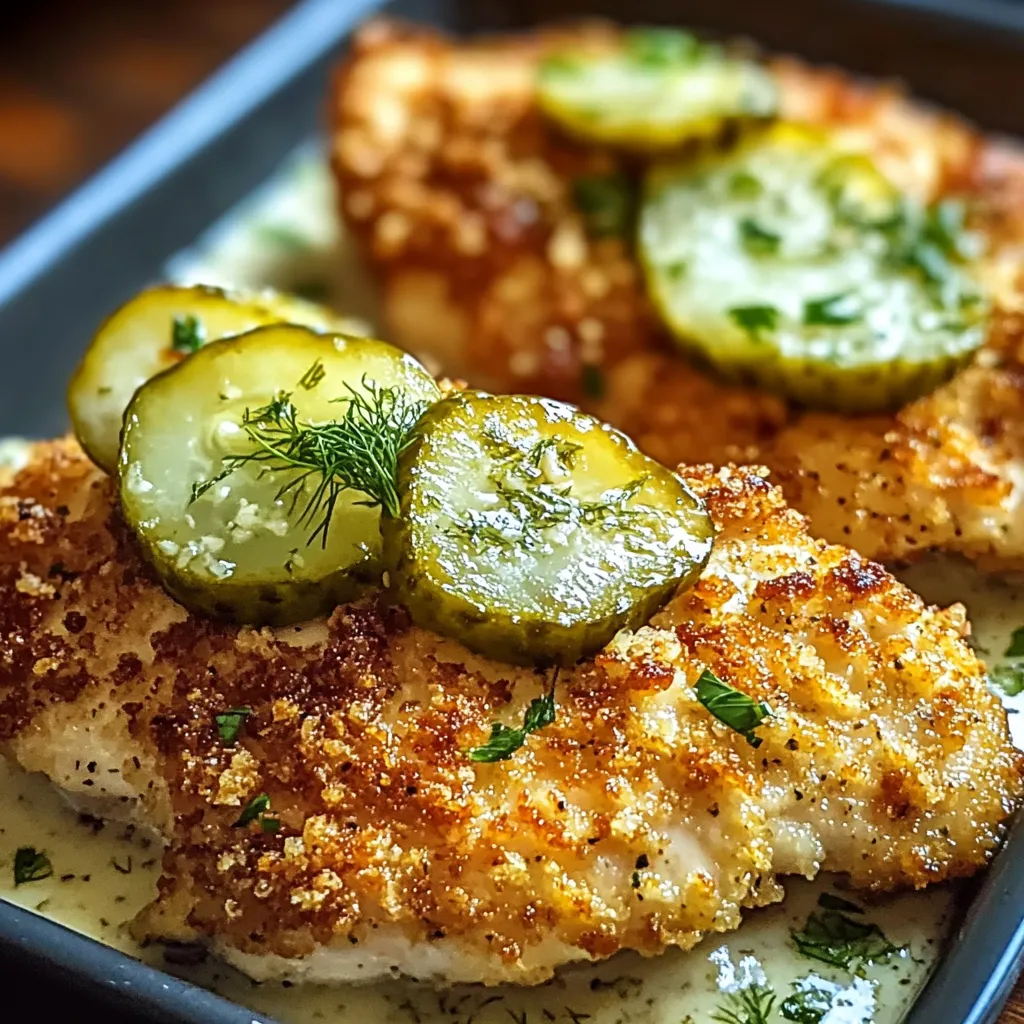
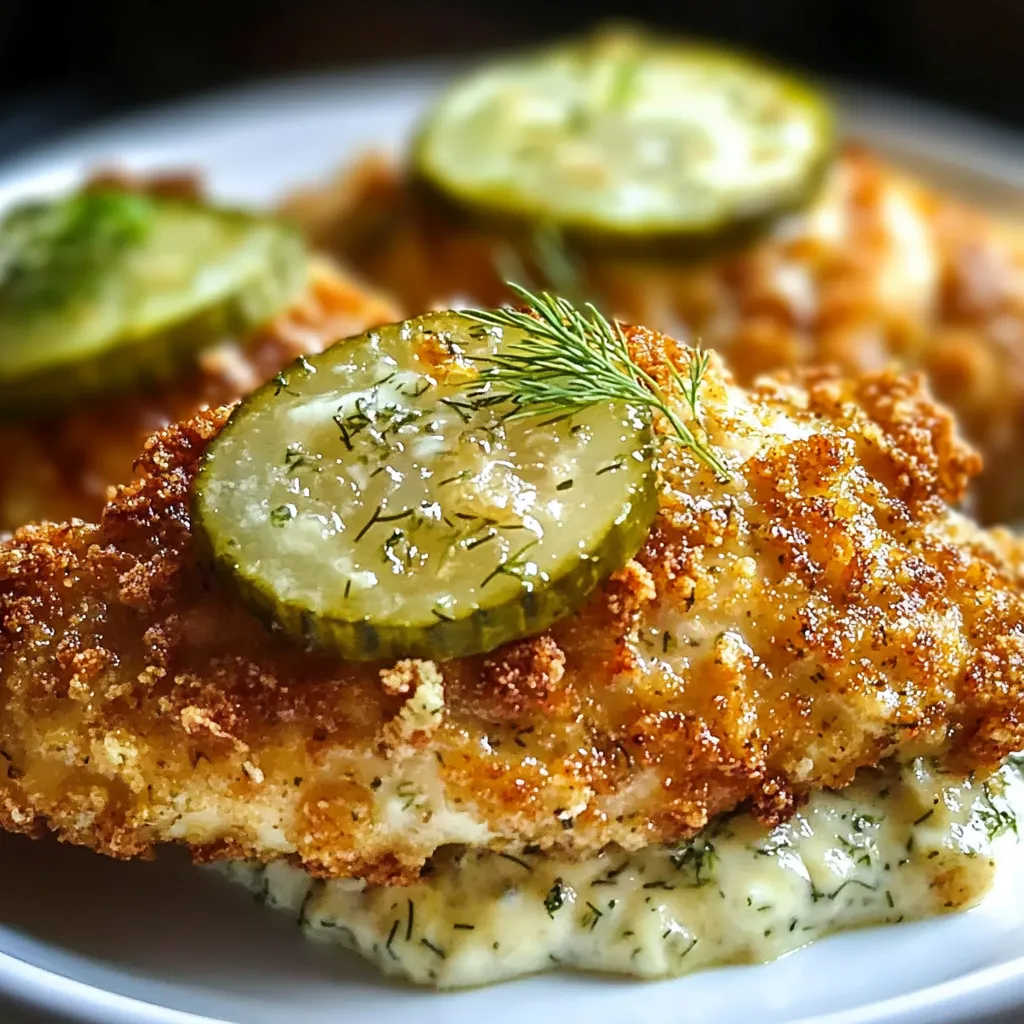
The tangy crunch of dill pickles meets tender, juicy chicken in this crispy dill pickle chicken dinner that turns ordinary weeknight cooking into something special. Marinating the chicken in pickle juice keeps it incredibly moist while infusing every bite with that distinctive dill flavor, and the golden Parmesan crust adds a satisfying crunch that makes this recipe irresistible.
This dinner works beautifully when you want something that feels restaurant-quality but doesn’t require fancy techniques or hard-to-find ingredients. The pickle juice marinade does most of the work for you, tenderizing the chicken while you go about your day. When dinner time rolls around, a quick breading and pan-fry transforms simple chicken breasts into something your family will request again and again.
Why You’ll Love This Crispy Dill Pickle Chicken Dinner
The pickle juice marinade is the secret weapon here. It keeps the chicken incredibly tender and adds a subtle tang that makes every bite interesting without overwhelming the dish. You get all that pickle flavor without the heaviness of deep frying or complicated preparations.
The Parmesan-breadcrumb coating creates a genuinely crispy exterior that stays crunchy even after the chicken rests. The combination of textures makes this dinner satisfying in a way that plain grilled chicken just can’t match. You get that crispy shell giving way to juicy, flavorful meat underneath.
This recipe is flexible enough to adapt to your preferences and dietary needs. Bake it instead of frying for a lighter version, add heat with red pepper flakes, or make it gluten-free with simple substitutions. The basic method stays the same regardless of how you customize it.
The chicken holds up beautifully as leftovers, which means you can make extra and have lunch sorted for the next few days. It’s just as good cold in a salad or reheated in the oven until the coating crisps back up.
Ingredients for Crispy Dill Pickle Chicken Dinner
I always use fresh dill pickle juice rather than the jarred kind marketed specifically for marinating. The juice straight from a jar of good pickles has better flavor and the right salt level to tenderize the chicken without making it taste artificial. Make sure you have enough to fully submerge the chicken breasts.
- 4 chicken breasts, boneless and skinless
- 1 cup dill pickle juice
- 1 cup breadcrumbs (preferably seasoned)
- 1/2 cup grated Parmesan cheese
- 2 large eggs
- 1/2 cup all-purpose flour
- 1 teaspoon garlic powder
- 1 teaspoon onion powder
- 1/2 teaspoon paprika
- Salt and pepper to taste
- Cooking oil (for frying)
Look for chicken breasts that are similar in size so they cook evenly. If you have one or two that are significantly thicker, pound them to an even thickness before marinating. I prefer using panko breadcrumbs over regular ones because they create a lighter, crispier coating, but Italian-seasoned breadcrumbs work great too and add extra herbs to complement the dill.
The Parmesan cheese should be freshly grated rather than the shelf-stable kind in a shaker. Fresh Parmesan melts slightly during cooking and creates better adhesion for the breadcrumb coating. It also adds a nutty, savory depth that balances the tangy pickle flavor beautifully.
For frying, choose an oil with a high smoke point like vegetable, canola, or peanut oil. You need enough to create a shallow fry situation, about a quarter inch deep in your skillet. The eggs should be at room temperature if possible, as they coat the chicken more evenly that way.
How to Make Crispy Dill Pickle Chicken Dinner
The key is setting up your breading station efficiently and maintaining the right oil temperature throughout cooking. I find that having everything organized before you start makes the whole process smoother and keeps your coating from getting clumpy.
Marinate the Chicken
Place your chicken breasts in a large bowl or resealable plastic bag and pour in the dill pickle juice. Make sure every piece is completely submerged. If needed, add a splash of water to cover any exposed areas. Seal or cover the container and refrigerate for at least 30 minutes, though you can go up to 4 hours for even more flavor. The acid in the pickle juice breaks down proteins slightly, which is what makes the chicken so tender.
Prepare Your Breading Station
Set up three shallow bowls in a row on your counter. In the first bowl, whisk together the flour, garlic powder, salt, and pepper. The seasoned flour helps the egg adhere better and adds the first layer of flavor. In the second bowl, beat the eggs until the yolks and whites are completely combined. In the third bowl, mix the breadcrumbs with the grated Parmesan, onion powder, and paprika.
Heat the Oil
Pour enough oil into a large skillet to create a depth of about a quarter inch. Set it over medium heat and let it warm up for 3-4 minutes. Test the temperature by dropping in a single breadcrumb. If it sizzles immediately and starts to brown within a few seconds, your oil is ready. If it just sits there, the oil needs more time. If it burns instantly, lower the heat and let it cool slightly.
Bread the Chicken
Remove the chicken from the marinade and shake off excess pickle juice. Pat each piece lightly with a paper towel to remove surface moisture, which helps the coating stick better. Working with one breast at a time, dredge it thoroughly in the seasoned flour, shaking off any excess. Dip it into the beaten eggs, letting extra egg drip back into the bowl. Finally, press it into the breadcrumb mixture, coating both sides completely and pressing gently to help the crumbs adhere.
Fry to Golden Perfection
Carefully place the breaded chicken into the hot oil, laying it away from you to avoid splatter. Don’t crowd the pan. Depending on your skillet size, you might need to work in batches of two pieces at a time. Fry for 5-7 minutes on the first side without moving it around. You want that crust to set completely before flipping. When the edges look golden and crispy, use tongs to flip the chicken and cook the second side for another 5-7 minutes. The internal temperature should reach 165°F when checked with an instant-read thermometer.
Rest and Serve
Transfer the finished chicken to a plate lined with paper towels to drain excess oil. This is an important step. Let the chicken rest for 5-10 minutes before serving. This resting time allows the juices to redistribute throughout the meat, keeping every bite moist and flavorful. The coating will also firm up slightly during this time, making it even crispier.
What to Serve with Crispy Dill Pickle Chicken Dinner
This crispy chicken pairs beautifully with sides that balance its rich, tangy flavor without competing with it.
Creamy Coleslaw: The cool, crunchy texture of coleslaw provides a refreshing contrast to the warm, crispy chicken. Make it with a vinegar-based dressing rather than a heavy mayo one to keep the meal from feeling too rich. The cabbage also adds a vegetable element without requiring any cooking.
Roasted Sweet Potato Wedges: Cut sweet potatoes into wedges, toss with olive oil and a sprinkle of salt, then roast at 425°F until caramelized on the edges. The natural sweetness complements the savory, tangy chicken while adding nutrition and color to your plate.
Fresh Garden Salad: Keep it simple with mixed greens, cherry tomatoes, cucumber, and a light vinaigrette. The crisp vegetables and acidic dressing refresh your palate between bites of the rich chicken. This is especially nice in warmer months when you want something light alongside the fried protein.
Garlic Mashed Potatoes: Creamy mashed potatoes make this dinner feel more substantial and comforting. The mild potato flavor lets the pickle-Parmesan chicken shine, and they’re perfect for soaking up any extra dipping sauce you might serve.
Steamed Broccoli with Lemon: Simple steamed broccoli finished with a squeeze of fresh lemon juice and a pat of butter adds a healthy green element. The slight bitterness of the broccoli balances the richness of the fried chicken nicely.
Mac and Cheese: For a truly indulgent meal that kids especially love, serve the chicken alongside creamy mac and cheese. The combination feels like elevated comfort food that satisfies everyone at the table.
Pro Tips & Variations
Even Thickness Matters: Pound any thicker chicken breasts to an even thickness before marinating. This ensures they cook at the same rate and prevents some pieces from drying out while others are still undercooked. Aim for about three-quarters of an inch thick throughout.
Double-Dip for Extra Crunch: If you want an even thicker, crispier coating, go through the egg and breadcrumb steps twice. After the first complete coating, dip the chicken back into the egg and then into fresh breadcrumbs. This creates a restaurant-quality crust.
Baking Option: For a lighter version, skip the pan-frying entirely. Place the breaded chicken on a greased baking sheet or wire rack set over a baking sheet. Spray the tops lightly with cooking spray and bake at 400°F for 20-25 minutes, flipping halfway through. The coating won’t be quite as crispy as fried, but it’s still delicious.
Make It Spicy: Add cayenne pepper or crushed red pepper flakes to the breadcrumb mixture for heat that builds with each bite. You can also drizzle hot sauce into the pickle juice marinade for an extra kick throughout the chicken.
Sandwich Version: Serve the chicken on toasted brioche buns with lettuce, tomato, and extra pickle slices for an incredible sandwich. Add a spread of ranch dressing or mayo mixed with a bit of pickle juice for the perfect finishing touch.
Gluten-Free Adaptation: Substitute all-purpose flour with a gluten-free flour blend and use gluten-free breadcrumbs. The texture stays nearly identical, and no one will know the difference. Just make sure your Parmesan doesn’t contain any hidden gluten additives.
Chicken Tenders: Cut the chicken breasts into strips before marinating to make chicken tenders instead. Reduce the cooking time to 3-4 minutes per side since they’re thinner. Kids love this variation, and tenders cook faster on busy weeknights.
Air Fryer Method: Coat the chicken as directed and place in a single layer in your air fryer basket. Spray lightly with cooking oil and air fry at 380°F for 12-15 minutes, flipping halfway through. This gives you crispy results without any oil for frying.
Storage & Reheating Tips
Store leftover crispy dill pickle chicken in an airtight container in the refrigerator for 3-4 days. I use glass containers with tight-fitting lids because they don’t hold onto odors and keep the chicken fresh longer. Let the chicken cool completely before storing to prevent condensation from making the coating soggy.
For the best reheating results, use your oven rather than the microwave. Place the chicken on a wire rack set over a baking sheet and heat at 350°F for 10-12 minutes until warmed through. The rack allows air to circulate underneath, which helps the coating crisp back up. Microwaving will warm the chicken but turns the coating soft and chewy.
This chicken freezes well for up to 2 months. Wrap each piece individually in plastic wrap, then place them together in a freezer-safe container or bag. Thaw overnight in the refrigerator before reheating. Frozen chicken goes straight from the freezer to a 325°F oven for about 25 minutes until heated through.
Cold leftover chicken makes an excellent lunch. Slice it and add it to salads, or make a sandwich with your favorite toppings. The pickle flavor actually intensifies slightly after a day in the refrigerator, which many people prefer.
Common Questions
Can I use chicken thighs instead of breasts? Absolutely. Boneless, skinless chicken thighs work wonderfully and stay even more moist than breasts. The marinating and cooking times remain the same, though thighs may need an extra minute or two in the pan to reach 165°F internally.
What if I don’t have pickle juice? You can substitute buttermilk mixed with a tablespoon of white vinegar and a teaspoon of dried dill. It won’t taste exactly the same, but it will still tenderize the chicken and provide tangy flavor.
How do I keep the coating from falling off? Make sure the chicken is relatively dry when you start breading, press the breadcrumbs firmly into the chicken, and let the breaded pieces rest for 10 minutes before frying. Don’t move the chicken around in the pan while it cooks. Let the crust set completely before flipping.
Can I make this ahead of time? You can bread the chicken up to 4 hours ahead and keep it refrigerated on a plate covered loosely with plastic wrap. The coating actually adheres better when it has time to set. Just bring the chicken to room temperature for 15 minutes before frying.
Why is my chicken dry even after marinating? Overcooking is usually the culprit. Use an instant-read thermometer and remove the chicken from the heat as soon as it hits 165°F. Carryover cooking will bring it up another few degrees while it rests. Also make sure your oil isn’t too hot, which can cook the outside too quickly while leaving the inside undercooked.
This crispy dill pickle chicken dinner brings together unexpected flavors in a way that makes perfect sense on the plate. The tangy marinade, crunchy coating, and juicy interior create layers of flavor and texture that turn a simple chicken breast into something memorable.
Crispy Dill Pickle Parmesan Chicken
Ingredients
Equipment
Method
- Place chicken breasts in a large bowl or resealable bag and add dill pickle juice. Make sure chicken is completely submerged. Refrigerate for at least 30 minutes, up to 4 hours.
- Set up three shallow bowls for breading. In the first bowl, combine flour, garlic powder, salt, and pepper. In the second bowl, beat the eggs until combined. In the third bowl, mix breadcrumbs with Parmesan cheese, onion powder, and paprika.
- Heat about 1/4 inch of oil in a large skillet over medium heat until it reaches frying temperature. Test by dropping in a breadcrumb – it should sizzle immediately.
- Remove chicken from marinade and shake off excess pickle juice. Pat lightly with paper towels. Working with one breast at a time, dredge in seasoned flour, dip in beaten eggs, then coat thoroughly with breadcrumb-Parmesan mixture, pressing gently to adhere.
- Carefully place breaded chicken in hot oil without crowding the pan. Fry for 5-7 minutes on the first side without moving. Flip and cook for another 5-7 minutes until golden brown and internal temperature reaches 165°F.
- Transfer cooked chicken to a plate lined with paper towels to drain excess oil. Let rest for 5-10 minutes before serving.