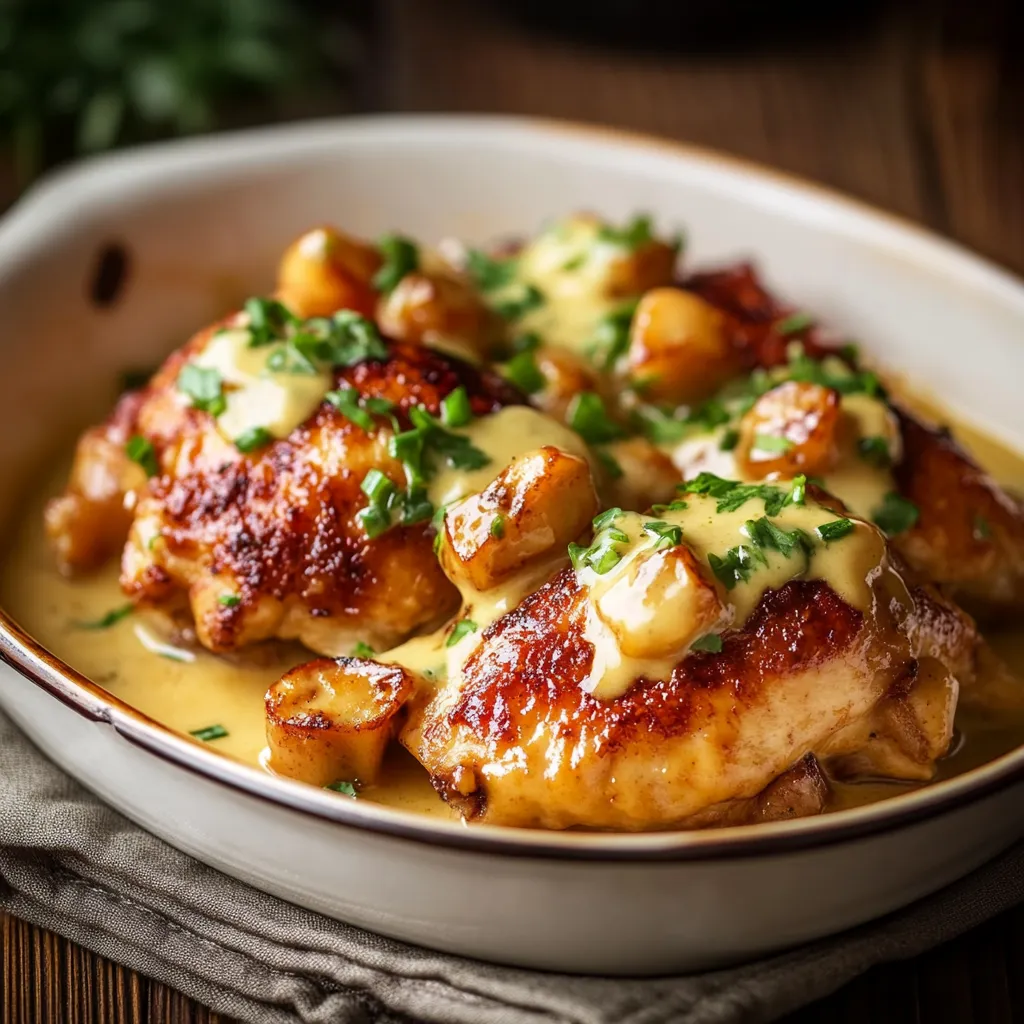
There’s a particular rainy Saturday I recall, where my best friend and I decided that ordering takeout just wouldn’t cut it, we wanted something comforting, something special. We landed on attempting Honey Butter Chicken for the first time, and the aroma that filled my tiny apartment that day is something I’ll never forget. This recipe is a simplified, perfected version of that initial adventure, promising you a plate of golden, sticky, and utterly irresistible chicken that will become a new favorite.
Why You’ll Fall in Love with This Honey Butter Chicken Recipe

Okay, friend, let’s be real. There are a million chicken recipes out there. So, why should you try this one? Simple. It’s the perfect blend of sweet, savory, and oh-so-satisfying. Plus, it’s easier than you might think! Here’s what makes this Honey Butter Chicken stand out:
- Flavor Explosion: The combination of honey and butter creates a caramelized, irresistible coating that you’ll want to lick off your plate.
- Surprisingly Simple: We’re talking minimal ingredients and straightforward steps. No fancy techniques required!
- Versatile: Serve it with rice, noodles, veggies – the possibilities are endless.
- Crowd-Pleaser: Whether it’s a weeknight dinner or a casual get-together, this Honey Butter Chicken is always a hit.
Ingredients You’ll Need
Let’s gather our cast of characters. Don’t worry, most of these are probably already hanging out in your pantry:
For the Chicken:
- Chicken Thighs (boneless, skinless): I prefer thighs because they stay incredibly juicy and flavorful, even when cooked at higher temperatures. You can use chicken breasts, but be careful not to overcook them!
- All-Purpose Flour: This helps create a crispy coating for the chicken.
- Salt & Pepper: Essential for seasoning. Don’t be shy!
- Garlic Powder: Adds a savory depth.
- Paprika: For a touch of smokiness and color.
- Eggs: Act as a binder, helping the flour adhere to the chicken.
- Oil (for frying): Vegetable or canola oil works best.
For the Honey Butter Sauce:
- Butter: Unsalted is best so you can control the saltiness.
- Honey: The star of the show! Use a good quality honey for the best flavor.
- Soy Sauce: Adds a salty, umami kick that balances the sweetness.
- Garlic (minced): Freshly minced is always best for flavor.
- Rice Vinegar: Adds a touch of acidity to cut through the richness.
- Red Pepper Flakes (optional): For a little heat!
- Sesame Seeds (for garnish): Adds a nutty flavor and visual appeal.
- Green Onions (for garnish): For freshness and a pop of color.
Step-by-Step Guide to Honey Butter Chicken Perfection
Alright, friend, let’s get cooking! I’ll walk you through each step to make sure your Honey Butter Chicken turns out amazing.
Step 1: Prep the Chicken
- Cut the chicken: If your chicken thighs are particularly large, cut them into smaller, bite-sized pieces. This helps them cook evenly and makes them easier to eat.
- Prepare the breading station: In one shallow dish, combine the flour, salt, pepper, garlic powder, and paprika. In another shallow dish, whisk the eggs.
- Bread the chicken: Dip each piece of chicken into the egg mixture, then dredge it in the flour mixture, making sure to coat it completely. Pat the flour on gently to help it adhere.
Step 2: Fry the Chicken
- Heat the oil: Pour about 1/2 inch of oil into a large skillet or frying pan. Heat the oil over medium-high heat until it reaches around 350°F (175°C). You can test the temperature by dropping a small piece of bread into the oil – if it sizzles and turns golden brown in about 30 seconds, the oil is ready.
- Fry the chicken: Carefully add the chicken to the hot oil in a single layer, being careful not to overcrowd the pan. Fry for about 5-7 minutes per side, or until the chicken is golden brown and cooked through.
- Drain the chicken: Remove the chicken from the pan and place it on a wire rack or paper towel-lined plate to drain excess oil.
Step 3: Make the Honey Butter Sauce
- Melt the butter: In a large skillet or wok, melt the butter over medium heat.
- Add the garlic: Add the minced garlic and cook for about 30 seconds, or until fragrant. Be careful not to burn the garlic!
- Whisk in the remaining ingredients: Add the honey, soy sauce, rice vinegar, and red pepper flakes (if using). Whisk until everything is well combined and the sauce is smooth.
- Simmer the sauce: Bring the sauce to a simmer and cook for about 2-3 minutes, or until it thickens slightly.
Step 4: Combine and Serve
- Add the chicken: Add the fried chicken to the skillet with the honey butter sauce. Toss to coat the chicken evenly.
- Garnish and serve: Sprinkle with sesame seeds and green onions. Serve immediately and enjoy!
Pro Tips for the BEST Honey Butter Chicken
Want to take your Honey Butter Chicken to the next level? Here are a few of my favorite tips:
- Don’t overcrowd the pan: When frying the chicken, make sure to do it in batches. Overcrowding the pan will lower the oil temperature and result in soggy chicken.
- Use a thermometer: To ensure your chicken is cooked through, use a meat thermometer. The internal temperature should reach 165°F (74°C).
- Adjust the sweetness: Taste the honey butter sauce and adjust the amount of honey to your liking. If you prefer a less sweet sauce, you can add a squeeze of lemon juice or a splash of rice vinegar.
- Make it spicy: If you like a little heat, add more red pepper flakes to the sauce. You can also add a pinch of cayenne pepper to the flour mixture for the chicken.
- Serve it fresh: Honey Butter Chicken is best served immediately while the chicken is crispy and the sauce is warm and sticky.
Variations and Substitutions
Want to put your own spin on this recipe? Here are a few ideas:
- Chicken Breasts: As mentioned, you can use chicken breasts instead of thighs. Just be sure to cut them into smaller pieces and cook them until they are just cooked through to avoid drying them out.
- Gluten-Free: To make this recipe gluten-free, use gluten-free flour for the breading and tamari instead of soy sauce.
- Air Fryer: For a healthier option, you can air fry the chicken instead of frying it in oil. Preheat your air fryer to 400°F (200°C) and cook the chicken for about 12-15 minutes, flipping halfway through, or until it is golden brown and cooked through.
- Different Sauce Flavors: Get creative with the sauce! Try adding a touch of ginger, a splash of sriracha, or a squeeze of lime juice.
Serving Suggestions
Honey Butter Chicken is delicious on its own, but it’s even better when served with the right sides. Here are a few of my favorite pairings:
- Rice: Steamed white rice or brown rice is a classic choice. The rice soaks up the delicious honey butter sauce perfectly.
- Noodles: Egg noodles or ramen noodles are also great options. Toss them with a little bit of the honey butter sauce for extra flavor.
- Vegetables: Steamed broccoli, green beans, or bok choy are all great choices. They add a healthy dose of nutrients and balance out the richness of the chicken.
- Salad: A simple green salad with a light vinaigrette is a refreshing contrast to the sweet and savory chicken.
What Makes This Recipe So Good?
It all comes down to the perfect balance of flavors and textures. The crispy, golden-brown chicken combined with the sweet, savory, and slightly tangy honey butter sauce is a match made in heaven. Plus, the simplicity of the recipe makes it accessible to cooks of all skill levels. This isn’t like making Oven-baked Crispy Parmesan Chicken where you are focused on a perfectly thin crust, it’s more about the sauce!
The secret ingredient? It’s probably the rice vinegar, which just adds that perfect little touch of tangy brightness that cuts through the richness of the honey and butter. Don’t skip it!
Other Chicken Recipes You Might Enjoy
If you’re a fan of chicken recipes, here are a few other ones you might like to try:
- Crock Pot Marry Me Chicken: A creamy, flavorful chicken dish that’s perfect for a cozy night in. Let your slow cooker do all the work!
- Marry Me Chicken Pasta: The same delicious flavors as the crockpot version, but in a pasta dish. Perfect for a quick and easy weeknight meal.
- Baked Crunchy Hot Honey Chicken: A spicy and sweet twist on classic fried chicken. The perfect combination of heat and honey! You can see how these two recipes are related!
- Cowboy Butter Chicken Bites: Bite-sized pieces of chicken coated in a savory and flavorful cowboy butter sauce. Perfect as an appetizer or a main course.
- Garlic Butter Chicken Pasta: A creamy, garlicky pasta dish with tender pieces of chicken. Perfect for a comforting and satisfying meal.
How to Store and Reheat Honey Butter Chicken
If you have any leftovers (which is unlikely!), you can store them in an airtight container in the refrigerator for up to 3 days. To reheat, you can use the microwave, oven, or skillet. Keep in mind that the chicken might not be as crispy after reheating, but it will still be delicious!
- Microwave: Reheat the chicken in the microwave for about 1-2 minutes, or until heated through.
- Oven: Preheat your oven to 350°F (175°C) and reheat the chicken on a baking sheet for about 10-15 minutes, or until heated through.
- Skillet: Reheat the chicken in a skillet over medium heat for about 5-7 minutes, or until heated through. You can add a little bit of water or chicken broth to the skillet to help keep the chicken moist.
Honey Butter Chicken: Frequently Asked Questions
Got questions? I’ve got answers! Here are some of the most common questions I get about Honey Butter Chicken:
- Can I use frozen chicken? Yes, but make sure to thaw it completely before cooking. Pat it dry with paper towels to remove any excess moisture.
- Can I make this recipe ahead of time? You can prepare the honey butter sauce ahead of time and store it in the refrigerator for up to 3 days. However, it’s best to fry the chicken and combine it with the sauce just before serving for the best results.
- Can I use a different type of honey? Yes, you can use any type of honey you like. Clover honey, wildflower honey, and manuka honey are all good options.
- Can I add vegetables to the sauce? Absolutely! Bell peppers, onions, and carrots are all great additions to the sauce.
Final Thoughts: Enjoy Your Homemade Honey Butter Chicken!
There you have it, my friend! Your very own Honey Butter Chicken, ready to impress your family and friends (or just yourself!). Remember to have fun in the kitchen, don’t be afraid to experiment, and most importantly, enjoy the process. Happy cooking!
Can I use chicken breasts instead of chicken thighs?
Yes, you can use chicken breasts. However, the recipe author prefers thighs because they stay juicier. If using breasts, cut them into smaller pieces and be careful not to overcook them.
How can I make this Honey Butter Chicken recipe gluten-free?
To make this recipe gluten-free, use gluten-free flour for breading the chicken and tamari instead of soy sauce in the sauce.
Can I prepare the honey butter sauce in advance?
Yes, you can prepare the honey butter sauce ahead of time and store it in the refrigerator for up to 3 days. However, it’s recommended to fry the chicken and combine it with the sauce just before serving for the best results.
What are some good side dishes to serve with Honey Butter Chicken?
The recipe suggests serving Honey Butter Chicken with rice, noodles, steamed vegetables like broccoli or green beans, or a simple green salad.

Best Honey Butter Chicken
Ingredients
Equipment
Method
- Cut the chicken into bite-sized pieces if needed.
- Prepare the breading station: In one shallow dish, combine the flour, salt, pepper, garlic powder, and paprika. In another shallow dish, whisk the eggs.
- Dip each piece of chicken into the egg mixture, then dredge it in the flour mixture, making sure to coat it completely. Pat the flour on gently to help it adhere.
- Pour about 1/2 inch of oil into a large skillet or frying pan. Heat the oil over medium-high heat until it reaches around 350°F (175°C).
- Carefully add the chicken to the hot oil in a single layer, being careful not to overcrowd the pan. Fry for about 5-7 minutes per side, or until the chicken is golden brown and cooked through. Ensure internal temperature reaches 165°F (74°C).
- Remove the chicken from the pan and place it on a wire rack or paper towel-lined plate to drain excess oil.
- In a large skillet or wok, melt the butter over medium heat.
- Add the minced garlic and cook for about 30 seconds, or until fragrant. Be careful not to burn the garlic!
- Add the honey, soy sauce, rice vinegar, and red pepper flakes (if using). Whisk until everything is well combined and the sauce is smooth.
- Bring the sauce to a simmer and cook for about 2-3 minutes, or until it thickens slightly.
- Add the fried chicken to the skillet with the honey butter sauce. Toss to coat the chicken evenly.
- Sprinkle with sesame seeds and green onions. Serve immediately and enjoy!