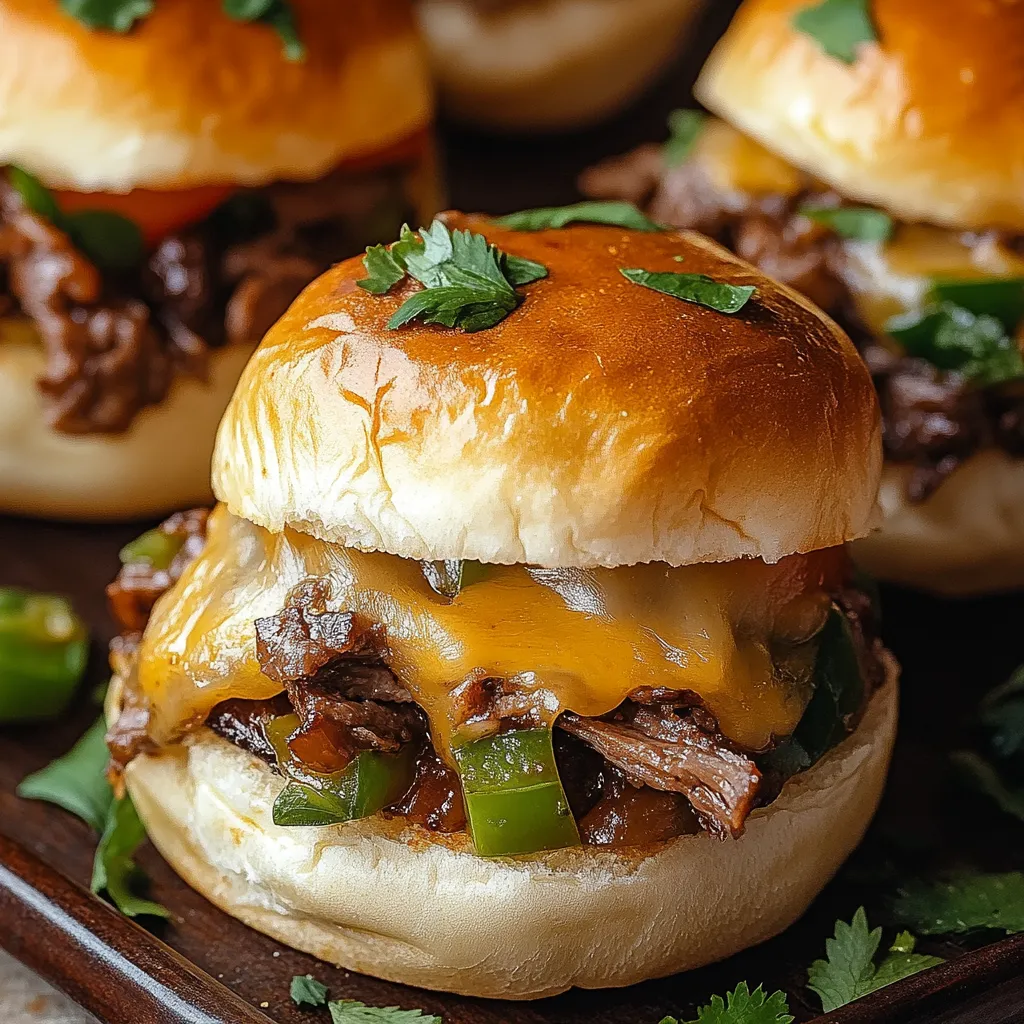
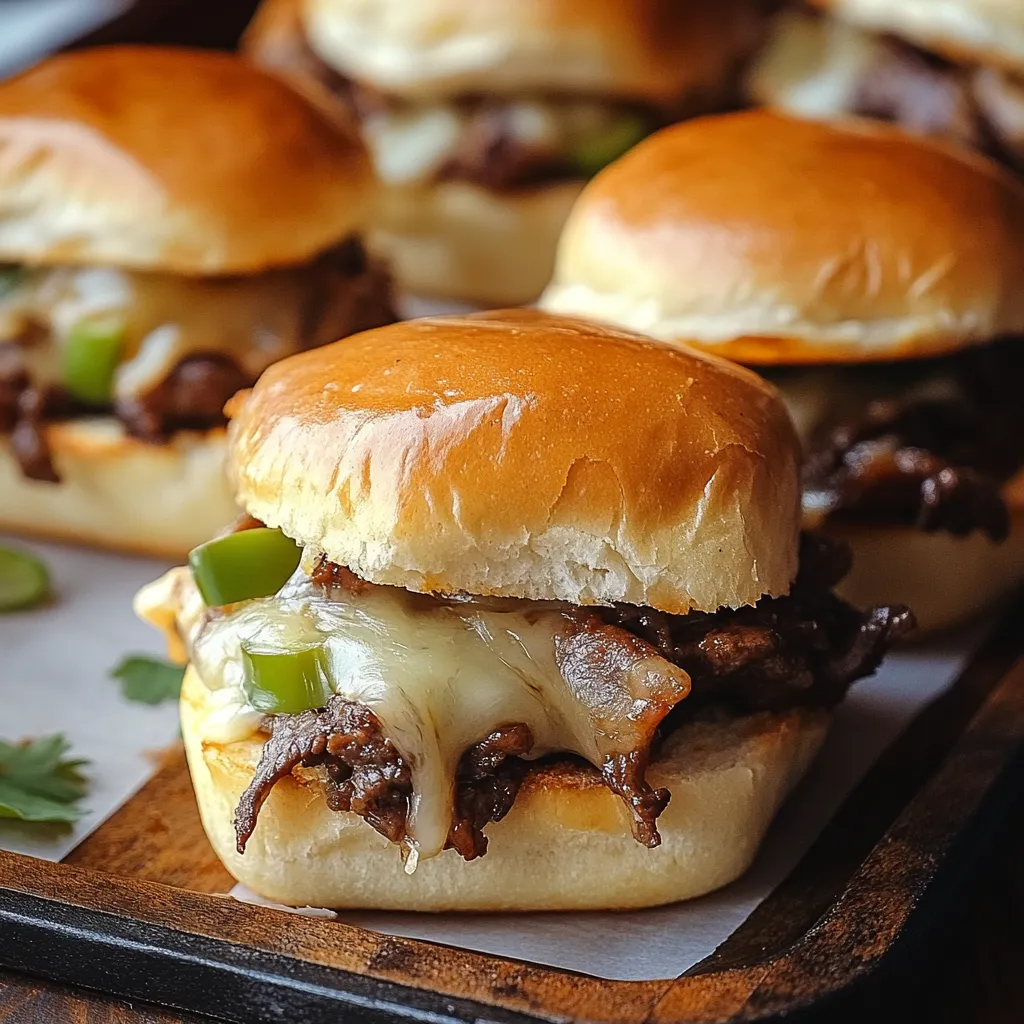
These sliders bring all the flavor of a classic Philly cheesesteak to your dinner table in a format that’s perfect for families. Tender shaved beef, sweet caramelized peppers and onions, and gooey melted Provolone cheese all come together on soft slider rolls with a savory garlic butter glaze brushed on top. The beauty of making these as sliders instead of individual sandwiches is that you can assemble everything in one pan and bake them all at once.
Perfect for busy weeknights when you want something special without spending an hour in the kitchen, these Philly Cheesesteak Sliders take just 35 minutes from start to finish. The garlic butter glaze soaks into the tops of the rolls as they bake, creating a golden, slightly crispy exterior that contrasts beautifully with the tender, cheesy filling inside.
Why You’ll Love These Philly Cheesesteak Sliders
These sliders deliver all the satisfaction of a traditional Philly cheesesteak in a convenient, shareable format. The combination of savory beef, sweet peppers and onions, and tangy Provolone creates layers of flavor that complement each other perfectly.
Baking the sliders together means the cheese melts evenly and the rolls steam slightly, creating soft, pull-apart texture that makes serving easy. You can slice them apart individually or let everyone pull their own from the pan.
The garlic butter glaze adds an extra dimension of flavor that sets these apart from regular sandwiches. It infuses the tops with herb and garlic notes while helping the rolls turn golden and slightly toasted.
Kids and adults both enjoy these sliders, making them ideal for family dinners when you need something that appeals to different ages and tastes. They’re also fantastic for casual entertaining since you can prep them ahead and pop them in the oven when guests arrive.
Leftovers reheat well, and the sliders are sturdy enough to pack for lunches the next day. The enclosed assembly keeps all the flavors contained without getting soggy.
Ingredients for Philly Cheesesteak Sliders
I always use pre-sliced roast beef from the deli counter for this recipe because it saves prep time and gives you that thin, tender texture that’s essential for authentic Philly cheesesteak flavor. Hawaiian rolls work beautifully here since they’re slightly sweet, which balances the savory filling.
The Protein & Base:
- 1 lb roast beef, thinly sliced or shaved
- 1 package (12 count) slider rolls (Hawaiian rolls recommended)
The Filling:
- 2 tbsp olive oil
- 1 medium green bell pepper, thinly sliced
- 1 medium yellow onion, thinly sliced
- 8 slices Provolone cheese
The Savory Glaze:
- 4 tbsp unsalted butter, melted
- 2 cloves garlic, minced
- 1 tsp Italian seasoning
- ½ tsp onion powder
The Essentials:
- Salt and black pepper to taste
Ingredient Notes:
For the roast beef, ask your deli counter to slice it as thin as possible, similar to what you’d use for sandwiches. If you can’t find pre-sliced, you can use thinly sliced steak like ribeye or sirloin and quickly sear it before assembling. I prefer Provolone cheese for authentic Philly flavor, but white American cheese is another traditional option that melts beautifully.
The slider rolls should be the connected kind that come in a single sheet, not individual buns. This makes assembly much easier and helps the sliders hold together during baking. If you can’t find Hawaiian rolls, any soft dinner rolls will work, though you might miss that slight sweetness.
Fresh garlic in the butter glaze makes a noticeable difference compared to garlic powder. I mince it very fine so it distributes evenly and doesn’t create any harsh bites in the finished dish.
How to Make Philly Cheesesteak Sliders
The secret to great sliders is layering the ingredients in the right order so the cheese melts properly and the rolls don’t get soggy. I find that cooking the vegetables until they’re really soft and caramelized brings out their natural sweetness.
Prepare Your Workspace: Preheat your oven to 350°F and grease a 9×13-inch baking dish with cooking spray or butter. This prevents the bottoms from sticking and makes cleanup easier.
Cook the Vegetables: Heat the olive oil in a large skillet over medium heat. Add the sliced bell pepper and onion, spreading them in an even layer. Cook for 5 to 7 minutes, stirring occasionally, until the vegetables are very soft and starting to caramelize around the edges. You want them to have some golden-brown color and a sweet, mellow flavor. Season lightly with salt and black pepper, then remove from heat and set aside.
Build the Base Layer: Using a serrated knife, carefully slice the entire sheet of slider rolls in half horizontally, keeping the top and bottom sections intact. Place the bottom half in your prepared baking dish. Lay 4 slices of Provolone cheese over the bottom rolls, tearing pieces to cover the surface evenly.
Add the Filling: Distribute the roast beef evenly over the cheese layer, making sure to cover all 12 rolls. If your roast beef slices are large, fold or tear them to fit. Spread the cooked peppers and onions over the beef in an even layer.
Top and Seal: Place the remaining 4 slices of Provolone cheese over the vegetables, again tearing to cover everything. Set the top half of the rolls over the filling, pressing down gently to compress the layers slightly.
Create the Glaze: In a small bowl, whisk together the melted butter, minced garlic, Italian seasoning, and onion powder until well combined. Using a pastry brush or spoon, generously brush the entire top surface of the rolls with the garlic butter mixture, making sure to get into any crevices between the rolls.
Bake to Perfection: Cover the baking dish tightly with aluminum foil and bake for 10 minutes. This covered baking time allows the cheese to melt without the tops getting too brown. Remove the foil and continue baking for another 5 to 10 minutes, uncovered, until the tops are golden brown and the cheese is completely melted and bubbling around the edges.
Serve: Remove from the oven and let the sliders rest for 2 to 3 minutes before slicing between each roll with a sharp knife. Serve immediately while the cheese is still gooey.
The most common mistake is undercooking the peppers and onions. Take the extra few minutes to really caramelize them since this builds flavor and ensures they’re tender enough to bite through cleanly when you eat the sliders.
What to Serve with Philly Cheesesteak Sliders
These hearty sliders pair well with lighter sides that add freshness and crunch to balance the rich, cheesy filling.
Crispy French Fries: Classic shoestring or steak fries are a natural match for cheesesteak flavors. The crispy exterior and fluffy interior provide textural contrast, and they’re perfect for dipping in ketchup or any leftover garlic butter from the sliders.
Simple Green Salad: A fresh mixed greens salad with a tangy vinaigrette cuts through the richness of the cheese and beef. Add cherry tomatoes, cucumber, and red onion for extra crunch and flavor that refreshes your palate between bites.
Coleslaw: Creamy or vinegar-based coleslaw adds a cool, crunchy element that complements the warm sliders. The acidity helps balance the savory flavors, and it’s easy to make ahead or pick up pre-made from the store.
Potato Chips: For the easiest possible side, serve with your favorite potato chips or kettle chips. The salty crunch works perfectly with the soft, cheesy sliders, and it takes zero preparation time.
Pickles and Pepperoncini: Tangy pickles or pepperoncini on the side provide a bright, acidic counterpoint to the rich filling. They’re traditional accompaniments to Philly cheesesteaks and add a nice pop of flavor.
Sweet Potato Fries: Oven-baked sweet potato fries offer a slightly healthier alternative to regular fries while adding natural sweetness that plays well with the caramelized onions and peppers in the sliders.
Pro Tips & Variations
Make-Ahead Strategy: Assemble the sliders completely, including the garlic butter on top, then cover tightly with plastic wrap and refrigerate for up to 4 hours before baking. When ready to serve, remove from the fridge, let sit at room temperature for 10 minutes, then bake as directed, adding a few extra minutes if needed.
Extra Flavor Boost: Spread a thin layer of mayonnaise or garlic aioli on the bottom rolls before adding the cheese and beef. This adds richness and helps create a moisture barrier that keeps the bread from getting soggy.
Crispier Tops: For extra-crispy tops, broil the sliders for the final 1 to 2 minutes of baking. Watch them closely since they can burn quickly under the broiler.
Cheese Options: While Provolone is traditional, white American cheese melts incredibly smoothly and creates that classic cheesesteak texture. You can also use a combination of both, or try pepper jack for a spicy kick.
Mushroom Addition: Sauté 8 ounces of sliced mushrooms along with the peppers and onions for an earthier, more substantial filling. This is especially good if you’re serving the sliders as the main course without many sides.
Spicy Version: Add sliced pickled jalapeños to the filling, or stir a few dashes of hot sauce into the garlic butter glaze. You can also use hot Italian sausage instead of roast beef for a completely different flavor profile.
Steak Upgrade: For special occasions, use thinly sliced ribeye steak instead of deli roast beef. Quickly sear it in the same pan after cooking the vegetables, then proceed with assembly.
Storage & Reheating Tips
Store leftover sliders in an airtight container in the refrigerator for up to 3 days. I separate them individually before storing so they’re easier to reheat and serve later.
For reheating individual sliders, wrap in a damp paper towel and microwave for 30 to 45 seconds until warmed through. The damp paper towel helps keep the bread soft and prevents it from drying out.
To reheat multiple sliders, place them in a baking dish, cover loosely with foil, and warm in a 300°F oven for 10 to 15 minutes. This method preserves the texture better than the microwave, though the tops won’t be quite as crispy as when freshly baked.
These sliders don’t freeze particularly well due to the vegetables and the soft rolls, which can become mushy when thawed. If you want to freeze them, do so before baking, then thaw completely in the refrigerator overnight before proceeding with the baking instructions.
Leftover sliders make excellent next-day lunches. Pack them cold and eat them at room temperature, or reheat them in a toaster oven for a few minutes to restore some of the original texture.
Common Questions
Can I use different types of cheese? Absolutely. White American cheese melts beautifully and is traditional for Philly cheesesteaks, while Swiss or mozzarella also work well. Avoid harder cheeses like cheddar since they don’t melt as smoothly.
What if I can’t find slider rolls? Use any soft dinner rolls or even a loaf of French bread cut into sections. The key is having soft bread that can soak up the garlic butter without getting tough.
Can I make these with chicken instead of beef? Yes, thinly sliced grilled chicken or rotisserie chicken works great. The cooking method stays the same, and the result is equally delicious with a lighter protein option.
How do I prevent the rolls from getting soggy? The cheese layers on both sides of the filling act as barriers. Make sure your vegetables are well-drained after cooking, and don’t skip the cheese layers. You can also lightly toast the cut rolls before assembling.
Can I add more vegetables? Mushrooms are a classic addition that fits the flavor profile perfectly. You could also add sliced tomatoes, but add them just before serving since they release moisture during baking.
These sliders prove that you don’t need to spend hours in the kitchen to create something special for dinner. With simple assembly and minimal active cooking time, you get restaurant-quality results that everyone will enjoy. Try these on your next busy weeknight and watch them disappear.
Philly Cheesesteak Sliders
Ingredients
Equipment
Method
- Preheat oven to 350°F and grease a 9×13-inch baking dish.
- Heat olive oil in a large skillet over medium heat. Add sliced bell pepper and onion, cooking for 5 to 7 minutes while stirring occasionally until soft and lightly caramelized. Season with salt and pepper, then remove from heat.
- Slice the slider rolls in half horizontally, keeping each half intact. Place the bottom half in the prepared baking dish.
- Layer 4 slices of Provolone cheese over the bottom rolls, tearing to cover evenly. Add the roast beef in an even layer, then spread the cooked peppers and onions over the beef.
- Top with the remaining 4 slices of Provolone cheese. Place the top half of the rolls over the filling, pressing down gently.
- In a small bowl, whisk together melted butter, minced garlic, Italian seasoning, and onion powder. Brush generously over the tops of the rolls.
- Cover with aluminum foil and bake for 10 minutes. Remove foil and bake for another 5 to 10 minutes until tops are golden brown and cheese is melted.
- Let rest for 2 to 3 minutes, then slice between rolls and serve hot.